|
|
|
Easter Bunny Tag~
This tutorial was written on March 9. 2003 with my own ideas. Please do not take this or any other the screen shots. If you like to use this tut you are more then welcome to use a text link only. What you make is yours and yours alone to do with as you please. I am only showing you how I achieved this effect. Thanks so much.
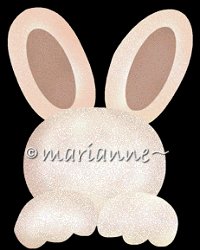
This is what we will be making today :)
Here is what we will need to do this tut.
Jasc Paint Shop Pro 7 you can get it here This is only a 30 trial.
Eyecandy 4000 you can get it here This is only a 30 day trial.
My Bunny Selections here
I've tried not to include many screen shots as this is fairly easy so I hope this works out ok. Just remember to save as sometimes I forget to say it and I am presuming you are :)
Ok this is all of the supplies are you ready ?
Remember to save often
Open a New Image Transparent 295x314
I flood filled mine with black #000000 we will delete this layer later this is just for viewing only as we build.
Layers /Add New Raster Layer
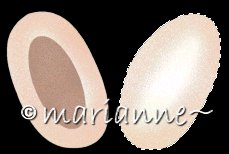
Go to Selections/Load from Disk and pick leftearmp1
Flood fill with color #E7E7D9 or your choice of color. Go to Effects/ Noise / Add 4 Uniform

Leave selected
Save
Go to your airbrush tool and use these settings color #E6C7B2

Spray around the outside of the ear lightly.
Deselect
Save
Layers /Add New Raster layer
Go to Selections/ Load from Disk and select linnerearmp
Floodfill with color #CAA595
Leave selected and go to Effects / Noise / Add 4 Uniform
Go back to your airbrush tool using color #E6C7B2 same settings spray lightly inside ear. Now go to Colors / Adjust / Brightness
using these settings

Select none.
Save
Layers /Add New Raster Layer
Go to Selections / Load from Disk and choose rtearmp.sel
Flood fill with Color # E7E7D9 or color of your choice.
Go to Effects / Noise / Add 4 Uniform
Leave selected.
Go to your airbrush tool and same setting as before using color #E6C7B2 , spray lightly around the ear.
Selections / Select None
This is what we should have so far.
SAVE.
Layers / Add New Raster Layer
Go to Selections / Load from Disk rtinnerearmp.sel
Floodfill with Color #CAA595
Go to your airbrush tool and using color #E6C7B2 spray lightly inside the ear. Same settings as before.
Leave Selected
Go to Colors / Adjust / Brightness Contrast use same settings as before. (Brightness (-20) Contrast (0)
Selections / Select None
Save
Layers / Add New Raster Layer
Go to Selections / Load from disk and load bunnyhead1mp.sel
Flood fill with Color #E7E7D9 or color of your choice.
Go to Effects/ Noise / Add 4 Uniform
Go to your Airbrush tool using color # CAA595
Selections / Select None
Save.
This is what we have so far............
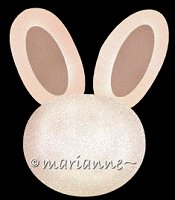
Layers /Add New Raster Layer
Go to Selections / Load from Disk and choose sel. leftpawmp
Flood fill with Color #E7E7D9.
Leave Selected
Go to your airbrush tool and spray your paw lightly with color #CAA595.
Selections / Select None
Save
Layers / Add New RasterLayer
Go to Selections / Load from disk and load sel. rtpawmp
Flood fill with your Color #E7E7D9 and leave selected and go to your airbrush tool and using color #CAA595 spray lightly around the paw.
This is what we have so far :)
Layers /Add New Raster Layer
Selections / Load from disk the bunnynose sel.
Flood fill with #CAA595
Selections / Select None
Save
Layers / Add New Raster Layer
Selections Load from disk and load mouth. sel
Floodfill with color #CAA595
Selections / Select none
Save
Layers/ Add New RasterLayer
Go to Selections / Load from Disk and choose bunnyeyemp.sel
Fllod fill with color #000000
Leave Selected
Go to Selections / Modify / Contract by 1
Using color #E6C7B2 go to your paintbrush with these settings
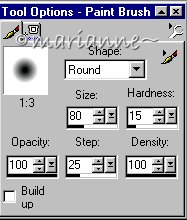
Go to the bottom of your eye where the ants are place your cursor there and click ONE time only :)
This is what you should have.

Leave selected change color to black #000000
Go back to the paintbrush and leave all settings the same but SIZE change to 50.
Now click again at the bottom of the ants one time.

Now still selected change color to white #FFFFFF
Go to your paintbrush and settings again the same EXCEPT size change it to Size 3
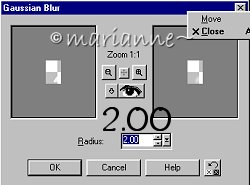
Add new layer and make a line in your eye as shown here

Go to Effects / Blur Gaussian Blur with these settings
Selections / Select None
Save
Turn off all layers (go to layer pallette and click on glasses) but these last 2 and merge together
Merge / Merge Visible
Then right click on that layer / Go to Duplicate/ Image / Mirror
Now turn all your layers back on (click on glasses again to turn on)
Layers/ New Raster Layer
Selections / Load from Disk choose pawmarkmp.sel
Flood fill with #CAA595
Selections / Select none
Save
OK now for the last part of all of this :) Hope you are still with me.
I find it easier to do it this way then more steps as we went so now to make him fuzzy.
These are the Eyecandy settings I used and we just do it to each layer now except for eyes, nose, mouth, and the paw marks. The rest do get it so I found just setting up Eyecandy then clicking on each layer saves time :) Here are the settings.
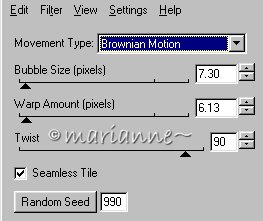
Go to the layers click on the ones to jiggle and apply then he is a fuzzy bunny.
Now that he is fuzzy you can merge all your layers
Layers /Merge Visible
Walla you have your bunny to do as you want :)
I hope you have enjoyed this tutorial and any questions please feel free to email me.
I want to thank Loretta for putting up with me during this tutorial. Shes a friend that even though across the miles seems like I have known her forever :) Thanks :)
Back to tutorials
![]()
![]()