|
|
|
Animated Lake and Frame

This tutorial was created on Oct.12,2004. Any similarities is purely coincidental. Please do not upload this tutorial to any website or use it in emails. Please provide a link back to the page and the site so we can keep this site free. Please do not make a script in PSP 8.
Supplies
Jasc. Paint Shop Pro 7 you can get it here.
A tube of your choice.
Make sure it will look good on a black background.
Graphics Plus filter you can get here.
Visman you can get that here
It is under Visman Plugin Party.
Flaming Pear Flood you can get it here.
When you get to the page, on the left side is Download, click that and scroll till you find Flood.
Now on to the tut.
1. Open a New Transparent Image.
Flood fill with color #000000
600 x 600
We can resize it later :)
2. Layers/ New Raster Layer
Select the tube you are going to use and apply.
Duplicate that layer.
Layers / Duplicate
Now we have to close that layer.
On the layer palette click on the eyeglasses to make a red x
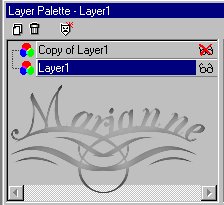
Now click on layer 1 to make it active. It will highlight in blue.
3. Effects/ Plugin Effects/ Flaming Pear/ Flood
Using these setting
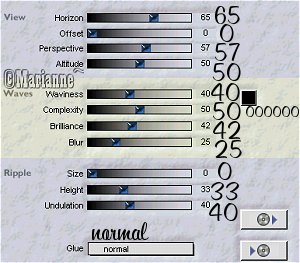
Hit ok
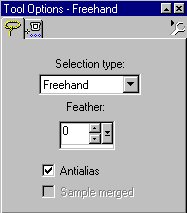
4. Click on your Freehand Tool
![]()
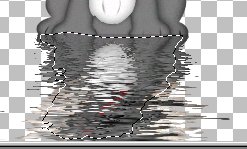
Now left click and hold and trace the outline of your water and then when you get to the end just release your mouse button.
This is what we have so far.
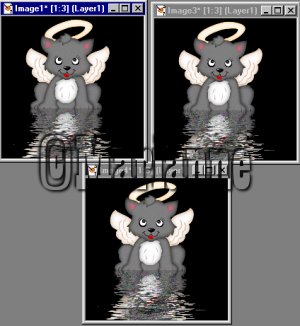
Duplicate your image 3 x by using Shift D
Making your first image active
5. Layers / New Raster Layer
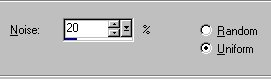
Effects/ Noise / Add and apply these settings
Selections / Select None
Click the Layer you have "X'd out and make it active
Layers / Merge / Merge Visible.
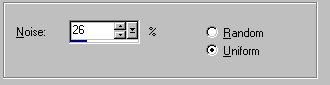
6. Make Image 2 active and apply noise again using these settings
Selections/ Select None
Click the Layer you have "X'd out and make it active
Layers/ Merge/ Merge Visible
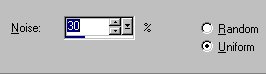
7. Make the 3rd image active and apply the Noise again using these settings
Selections / Select none.
Click the Layer you have "X'd out and make it active
Layers/ Merge/ Merge Visible
This is what we have so far I hope you are still with me lol.
Now you need to pick 2 colors using the Color Dropper making the foreground the darker and the background lighter.
Image/ Add Border/ using these settings
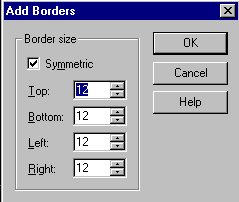
Now I did this to all my images so I didn't forget what I had to do.
So click on Image 2 and apply the border to that and then go to 3 and do the same.
Make our first image active and using the Magic Wand click on the border we just made to make it active.
Now go to Effects / Plugin Effects / Graphics Plus / Weaver
using these settings
Now do this to all 3 of our images.
Save
Selections / Select None.
Rotate your Foreground and Background Colors by clicking on the arrow in your color palette.

Make your first image active
Image/ Add Border/ using this setting
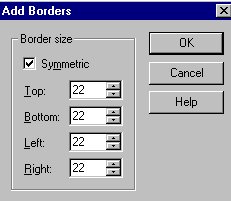
On all 3 images make the new border active using your Magic Wand.
Effects / Plugin Effects/ VM / Lightsplash
Using these settings
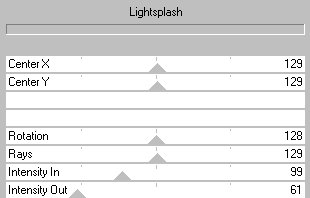
do that to all 3 images.
Selections/ Select none
Save
Now rotate colors again
Image / Add Border
using this setting
Do that to all 3 images
Go to your Magic Wand and make all the new Borders we just made active
Effects / Plugins/ Graphics Plus / Weaver
same settings as before.
Make sure you do that to all 3 images.
Selections / Select None
Now we are going to resize them all
Image/ Resize
300 x 300
Effects / Sharpen / Sharpen
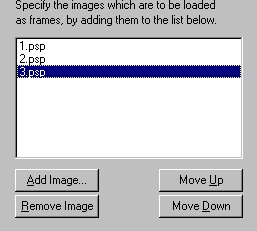
Save all three images and1,2,3.psp
Go to File / Jasc Software Products/ Launch Animation Shop
Click on Animation Wizard
![]()

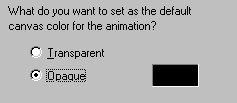
Next
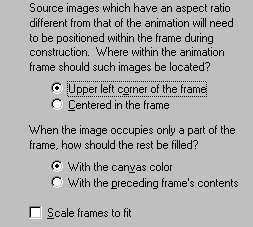
Next
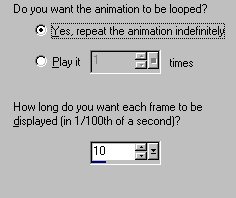
Next
Next
Next
Finish
When they load in Animation
View / Animation
Save
Any problems please feel free to email me @
MarianneP(nospam)@insight.rr.com
please remove the no spam
I hope you have enjoyed this tutorial.